NEAR PRAGUE
Kutná Hora • Terezín Memorial • Konopiště Castle
Sleeping and Eating in Kutná Hora
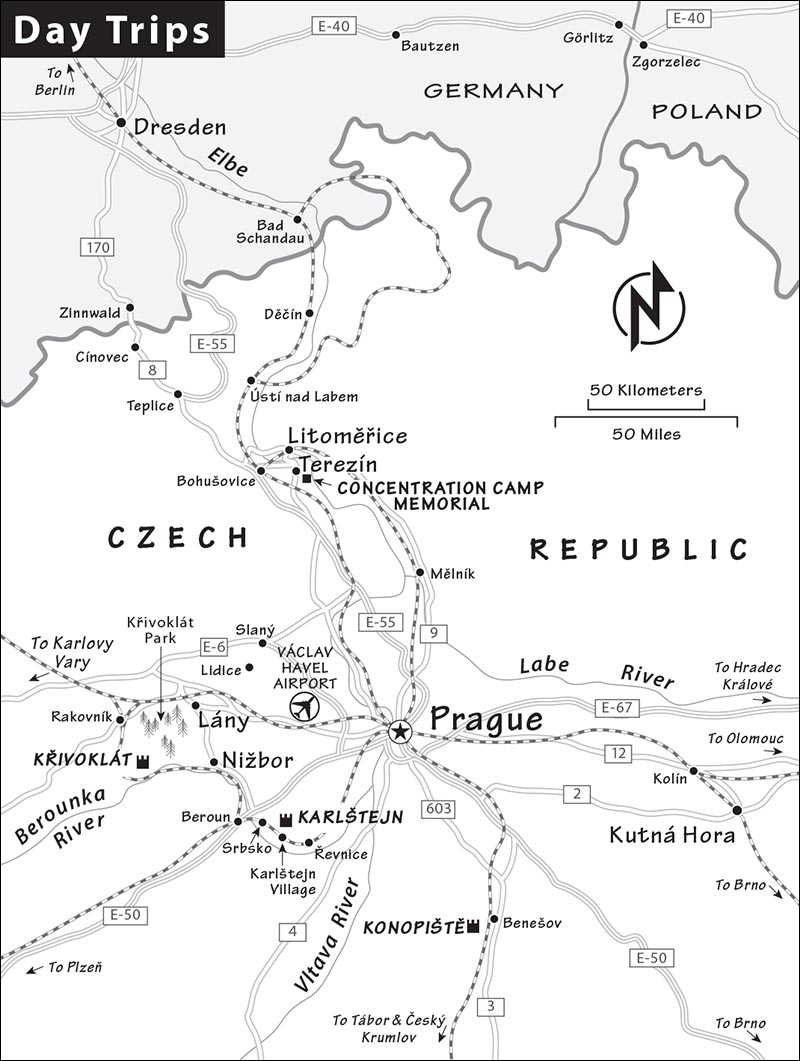
Prague has plenty to keep a traveler busy, but don’t overlook the interesting day trips in the nearby Bohemian countryside. Within a short bus or train ride of Prague (in different directions), you’ll find a rich medieval town, a sobering concentration camp memorial, and a grand castle.
Kutná Hora
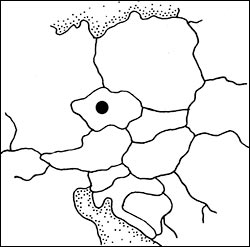
Kutná Hora (KOOT-nah HO-rah) is a refreshingly authentic yet unmistakably gorgeous town that sits on top of what was once Europe’s largest silver mine. In its heyday, the mine was so productive that Kutná Hora was Bohemia’s “second city” after Prague. Much of Europe’s standard coinage was minted here, and the king got a 12 percent cut of every penny. In addition to financing much of Prague’s grand architecture, these precious deposits also paid for Kutná Hora’s particularly fine cathedral. But by about 1700, the mining and minting petered out, and the city slumbered.
Once rich, then ignored, Kutná Hora is now appreciated by tourists looking for a handy side trip from Prague. While most visitors come here primarily for the famous, offbeat Sedlec Bone Church, the delightful town itself trumps it—with one of the finest Czech churches outside Prague (St. Barbara’s Cathedral), a breathtaking promenade overlooking the valley, a fascinating silver mine, and a cute, cobbled town center with pretty pastel houses.
All in all, underrated Kutná Hora makes a strong case for the title of “best Czech stop outside of Prague.” Unlike dolled-up Český Krumlov, Kutná Hora is a typical Czech town. The shops on the main square cater to locals, and the factory between the Sedlec Bone Church and the train station—since the 1930s, the biggest tobacco processor in the country—is now Philip Morris’ headquarters for Central Europe. Kutná Hora is about as close to quintessential Czech life as you can get. Small, untouristy original handicraft shops and many delightful cafés are worthwhile stops on a walk through town.
GETTING TO KUTNÁ HORA
The town is 45 miles east of Prague. Direct trains from Prague stop at Kutná Hora’s main train station, two miles from the town center (hourly, 1 hour; some require a transfer in Kolín). From the main station, a local train shuttles visitors in just a few minutes to Sedlec station (near the Sedlec Bone Church), then to the central Město station (near the rest of the sights). After getting off at the main station, follow the passage beneath the tracks to the cute little yellow local train. For train schedules, see https://idos.idnes.cz.
From Prague, make sure to buy a round-trip ticket to “Kutná Hora Město” rather than “Kutná Hora hl. n.” (the main station)—the price is nearly the same, and this gives you the flexibility to get off and on at any of the three Kutná Hora stations.
PLANNING YOUR TIME
For the most efficient visit, head to the Sedlec Bone Church first, then explore the town center. Kutná Hora is quiet on Sundays, when most shops are closed.
Here’s my suggested plan: At Kutná Hora’s main train station, transfer to the local train. Get off at its first stop (Kutná Hora Sedlec) and walk five minutes to the Bone Church, stopping at St. Mary’s Basilica along the way. After your visit, head to St. Barbara’s Cathedral in the town center via public bus or taxi. After touring the cathedral, follow my self-guided walk to the Czech Museum of Silver and take an English-language mine tour (book ahead online or by phone; if you arrive without a reservation, drop by in advance to sign up). At the end of the day, walk to Město station (about 15 minutes) to catch the train back to Kutná Hora’s main train station, where you’ll transfer to a train back to Prague.
Orientation to Kutná Hora
For a relatively small town (about 20,000 people), Kutná Hora is tricky to navigate: It’s long and skinny, with a spaghetti of lanes that stretch from the main train station, past the Bone Church, to the historical center, which sits on the summit of a promontory.
TOURIST INFORMATION
The main TI is on Kollárova street just a few steps from Palacký Square (daily 9:00-18:00, shorter hours off-season; +420 327 512 378, www.kutnahora.cz). It also rents bicycles.
Smaller TIs are located near the Bone Church (+420 326 551 049) and in front of the cathedral (handy WCs, +420 775 363 938).
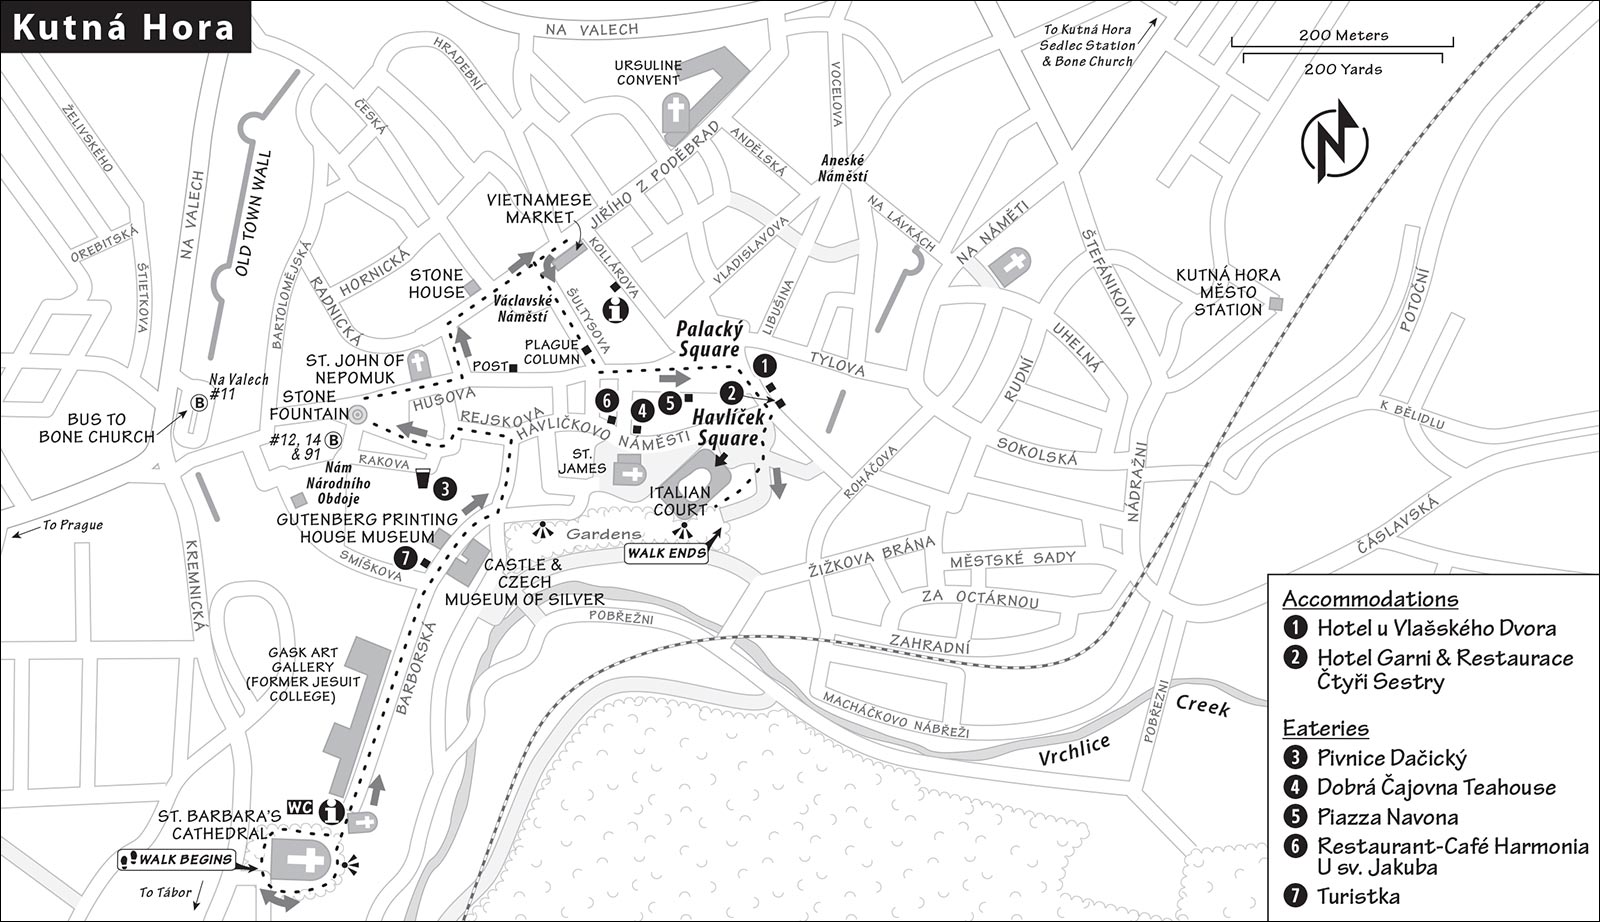
ARRIVAL IN KUTNÁ HORA
The Kutná Hora Sedlec station is a short walk from the Bone Church. From the station, head one block down the street perpendicular to the tracks heading toward the large St. Mary’s Basilica. Cross the main street. Immediately to your left is the TI and the ticket office. Buy your ticket here, then find the Bone Church in the middle of the cemetery directly ahead.
If you’re skipping the Bone Church (or not visiting it first), stay on the train to the Kutná Hora Město station in the valley. From there, hike up to St. Barbara’s Cathedral (about 20 minutes) to find the start of my self-guided Kutná Hora walk.
Kutná Hora Walk
Kutná Hora’s most famous sight—the Bone Church—is on the outskirts of town (in Sedlec) and listed later. This self-guided walk connects the rest of the sights you’ll want to see in a near-loop of the historical center. Before you get too far into the walk, call or drop by the Czech Museum of Silver to book a spot on the mine tour (if you have not already done so on their website). No stop on this walk is more than 10 minutes from the museum, so you can bail out and head for your tour at any point and easily resume the walk later.
• Begin in the inviting park surrounding the cathedral.
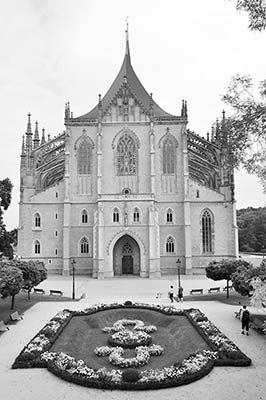
St. Barbara’s Cathedral and Park: Rising like three pointy tents from a forest of buttresses, St. Barbara’s strikes an exquisite Gothic profile. This culmination of Czech Gothic architecture was funded with a “spare no expense” attitude by a town riding the crest of a wave of mining wealth. Be sure to tour the cathedral’s interior (see listing, later)—but also take the time to do a slow lap around the pristine park that surrounds it.
Behind the church’s apse, belly up to the viewpoint for an orientation to the city. From left to right, visually trace the historical center that perches along the promontory’s crest: The long former Jesuit College now houses a modern art museum. The big, gray building that plunges down the cliff is the town’s “little castle” (Hrádek), with the Czech Museum of Silver. And the spire to the right of that bookends this walk. Surveying this scene, think about the history of a town made very, very rich by the glittering deposits it sits upon. Wealthy as it was, this was still an industrial town: The river below was so polluted they called it “Stink” in Czech. Notice the vineyards draping the hill.
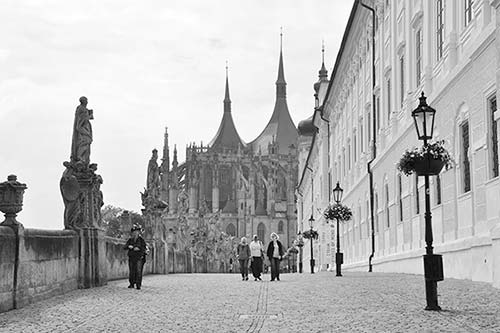
• After circling the church, walk along the grand...
Terrace: Just before you head along the panoramic promenade, notice the handy TI in the little house on the left. Then stroll regally along the stately white building, which now houses GASK, the contemporary Art Gallery of the Central Bohemian Region (permanent exhibit-100 Kč; Tue-Sun 10:00-18:00, closed Mon year-round and Jan-Feb).
Near the end of the terrace, continue following the broad cobbled footpath downhill...and keep an eye out for an army of white-jacketed, white-helmeted miners trudging up the hill for their daily shift. Or maybe they’re tourists, about to explore the former silver mine at the Czech Museum of Silver, which occupies the big building on your right (see listing, later). Across the street is the Gutenberg Printing House Museum, with an intriguing exhibit on 19th-century printing presses (120 Kč, Thu-Mon 10:00-17:00, Sat until 19:00, closed Tue-Wed).
• At the little park in front of the Czech Museum of Silver, take the left (level) fork, following Stone Fountain signs. When you hit the bigger street (with lots of parked cars), turn left (uphill, on Rejskova) and bear left around the big drab building. You’ll emerge into a little square (Rejskovo Náměstí), with a big and impressive...
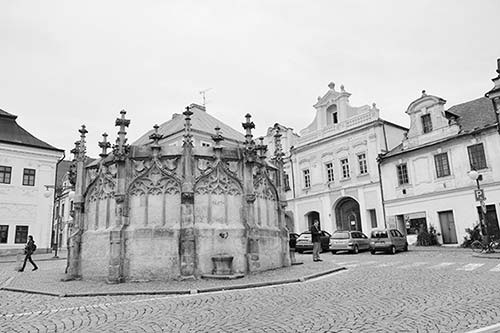
Stone Fountain (Kamenná Kašna): The intensive mining under Kutná Hora released arsenic and other toxins, poisoning the water supply. The city struggled with obtaining clean drinking water, which had to be brought to town by a sophisticated system of pipes, then stored in large tanks. At the end of the 15th century, the architect Rejsek built a 12-sided, richly decorated Gothic structure over one of these tanks. Although no longer functioning, the fountain survives unchanged—the only structure like it in Bohemia.
• Facing the fountain, hook right around the corner and head down Husova street. On the left, you’ll pass the stately town library (Městská Knihovna), then the gorgeous late-Baroque/Rococo Church of St. John of Nepomuk (named for the Czech patron saint). Turn left up the street after this church (Lierova). At the top of the street, turn right on Václavské Náměstí (Kutná Hora’s own Wenceslas Square). On your left, you’ll spot the frilly decorations on the...
Stone House (Kamenný Dům): Notice the meticulous detail in the grape leaves, branches, and animals on this house’s facade and up in its gable. Talented Polish craftsmen delicately carved the brittle stone into what was considered a marvel of its time. Inside is a moderately interesting museum dedicated to local life from the 17th to 19th century, with a vaulted cellar displaying Gothic masonry (100 Kč, Tue-Sun 9:00-18:00, shorter hours off-season, closed Mon and Dec-March).
• Continue past the house as the street opens into a leafy and inviting square. For a slice of “authentic Czech” life, continue straight when the street narrows again; a half-block down on your right, under the tržnice sign, is the town’s humble...
Vietnamese Market: This double row of stalls selling knock-off Nikes and cheap jeans is as much a part of Czech urban life today as farmers markets (Mon-Fri 7:30-16:45, shorter hours Sat, closed Sun). The stalls are run by Vietnamese immigrants, the Czech Republic’s third-largest minority (after Slovaks and Ukrainians). Many came here in the 1970s as part of a communist solidarity program that sent Vietnamese workers to Czech textile factories. They learned the language, adapted to the environment, and, after 1989, set off on a road to entrepreneurial success that allowed them to bring over friends and relatives.
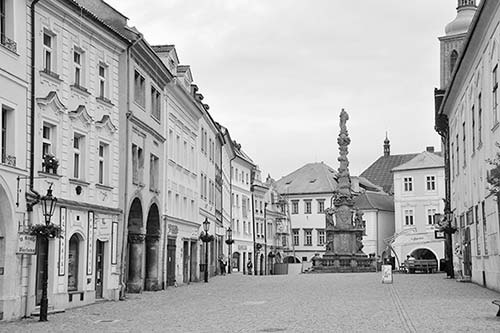
• Backtrack a few steps uphill, then turn left to walk down through the postcard-perfect Šultysova street, with a towering plague column at its center. Turn left at the street past the column, enjoying the pretty, colorful arcades. You’ll emerge into the lively main square.
Palacký Square (Palackého Náměstí): Beautiful but still somehow local, this square enjoys colorful facades, tempting al fresco restaurant tables, and generous public benches.
• Exit the square at the far-right corner, following the traffic-free street (in the gap between buildings, toward the green house). You’ll enter...
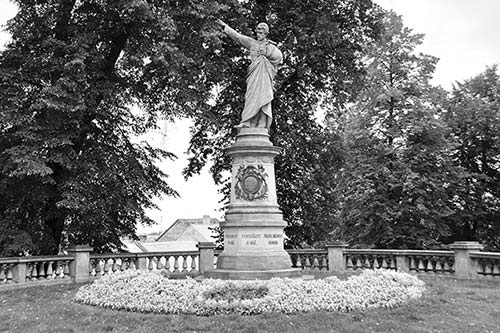
Havlíček Square (Havlíčkovo Náměstí): The monuments on this leafy, parklike square are a Who’s Who of important Czech patriots.
Straight ahead, the stone statue with his arm outstretched is Karel Havlíček (1821-1856), the founder of Czech political journalism (and the square’s namesake). From Kutná Hora, Havlíček ran an influential magazine highly critical of the Habsburg government. In 1851, he was forced into exile and detained for five years in the Tirolean Alps under police surveillance. His integrity is reflected by the quote inscribed on the statue: “You can try to bribe me with favors, you can threaten me, you can torture me, yet I will never turn a traitor.” His motto became an inspiration for generations of Czech intellectuals, most of whom faced a similar combination of threats and temptations. Havlíček (whose name means “little Havel”) was much revered in the 1970s and 1980s, when the other Havel (Václav) was similarly imprisoned for his dissent.
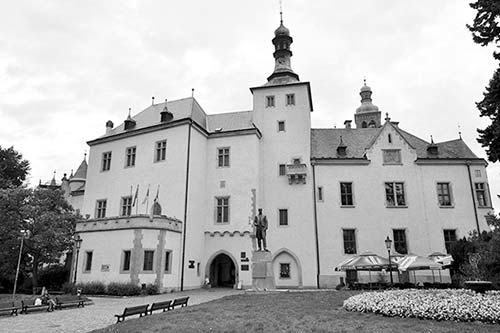
Below and to the right, the bronze, stoutly bearded statue in front of the big building honors the founder of Czechoslovakia, Tomáš Garrigue Masaryk (see sidebar on here). Circle around behind the pedestal to see the brief inscription tracing the statue’s up-and-down history, which parallels the country’s troubled 20th-century history: erected by Kutná Hora townspeople on October 27, 1938 (the eve of Czechoslovakia’s 20th birthday); torn down in 1942 (by occupying Nazis, who disliked Masaryk as a symbol of Czech independence); erected again on October 27, 1948 (by freedom-loving locals, a few months after the communist coup); torn down again in 1957 (by the communists, who considered Masaryk an enemy of the working class); and erected once again on October 27, 1991. Notice that the Czechs, ever practical, have left a blank space below the last entry.
Masaryk stands in front of the building known as the Italian Court (Vlašský Dvůr). Step inside its fine courtyard. This palace, located on the site where Czech currency was once made, became Europe’s most important mint and the main residence of Czech kings in the 1400s. It’s named for the Italian minters who came to Kutná Hora to teach the locals their trade. Most of the present-day building is a 19th-century reconstruction. Today, it hosts a moderately interesting museum that includes the Art Nouveau-decorated St. Wenceslas Chapel and displays on minting and local history in an original Gothic hall (120 Kč, daily 9:00-18:00, shorter hours Oct-March, ticket office on second floor inside courtyard).
Exiting the courtyard of the Italian Court, turn right and watch on the wall to your right for a small bronze tablet showing a hand flashing a peace sign, covered with barbed wire. This is an unassuming little memorial to the victims of the communist regime’s misrule and torture.
Continue straight down the steps into a little park, and then turn right to reach a great viewpoint. It overlooks the distinctive roof of the cathedral and the scenic valley below.
• Your walk is finished. If you’re headed for the Czech Museum of Silver, take this scenic route: Walk back up to Havlíček Square, circle around the Italian Court, curl along the downhill side of St. James’ Church, and enjoy the views. Eventually the view terrace dead-ends at a little lane that bends right and uphill, depositing you at the museum.
If you’re headed back to Prague, it takes about 15 minutes to walk to the Kutná Hora Město train station from Havlíček Square. Head downhill past the park, which funnels you between two buildings. Take the first left on Roháčova, then the first right on Sokolská. When you reach the wide cross street (Nádražní), turn left and follow the train tracks to the little pink station.
Sights in Kutná Hora
ON THE OUTSKIRTS
▲▲Sedlec Bone Church (Kostnice v Sedlci)
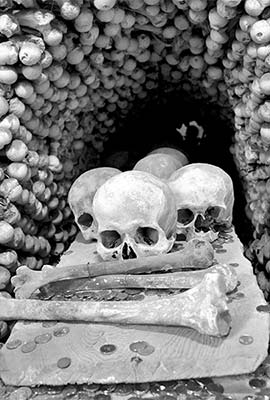
Located about 1.5 miles from the town’s historical center, the Sedlec Bone Church sits in a serene graveyard and looks unassuming from the outside. But inside, it’s filled with the bones of 40,000 people—stacked into neat, 20-foot-tall pyramids decorating the walls and ceilings. The 14th-century plagues and 15th-century wars provided all the raw material necessary for the monks who made these designs.
Cost and Hours: 160 Kč ticket covers the Bone Church and St. Mary’s Basilica, 320 Kč combo-ticket adds St. Barbara’s Cathedral; daily 8:00-18:00, March and Oct 9:00-17:00, Nov-Feb 9:00-16:00; good 20 Kč audioguide adds 15 minutes of commentary to make it more meaningful, +420 327 561 143, www.sedlec.info.
Visiting the Church: Stand outside the church. This is a place of reflection. The cemetery here was “seeded” with holy earth brought from Jerusalem, which made this sacred ground. Demand was high, and corpses that could no longer pay the rent (i.e., those who lacked surviving relatives with enough disposable income for postmortem real estate) were “evicted.” What to do with the bones? Recycle them as church decorations with a message.
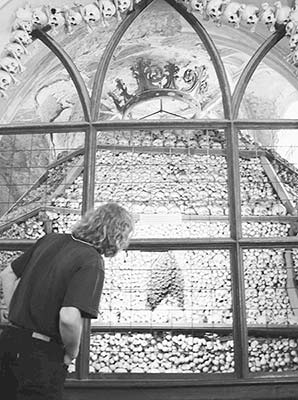
The monks, who first placed these bones 400 years ago, were guided by the belief that in order to live well, one must constantly remember death (memento mori—“what we are now, someday you shall be”). They also wanted to remind viewers that the earthly church was a community of both the living and the dead, a countless multitude that would one day stand before God. Later bone stackers were more interested in design than theology...as evidenced by the many show-off flourishes you’ll see around the church.
Approach the church. Ignore the dull upper chapel and head down below (look for the kostinec sign). Flanking the stairwell are two giant chalices made of bones (a symbol of Jan Hus’ egalitarian approach to worship).
Downstairs, on both sides are giant stacks of bones, reaching the top of the Gothic vaults (there are six such bone-pyramids in this small chapel). The skulls are neatly arranged on top, in the belief that this closeness to God would serve them well when Jesus returns to judge the living and the dead. Straight ahead dangles a chandelier, which supposedly includes at least one of every bone in the human body. In the glass case on the right (by the pillar), see the skulls with gnarly holes and other wounds. These belonged to soldiers who died fighting in the Hussite Wars—a boom time for this cemetery.
Finally, head into the left wing of the church, where you’ll find a giant coat of arms of the aristocratic Schwarzenberg family—decorated with the skull of an Ottoman invader (a fearsome foe of the time), whose “eye” is being pecked out by a raven made of human bones.
Your visit is over. Head into town, thankful all of your limbs are intact.
Nearby: You’ll pass the magnificent Sedlec St. Mary’s Basilica as you walk from the train station to the Bone Church. Originally predating both the silver mine and the town of Kutna Hora, St. Mary’s was burned down by the Hussites in 1421 and resurrected in the late 1600s by the great Baroque architect Santini. While the interior is not as impressive as St. Barbara’s, the stunning golden monstrance holder from the 1300s—in one of the chapels on the left—is worth a peek (160 Kč with Bone Church, 320 Kč combo-ticket with Bone Church and St. Barbara’s Cathedral; Mon-Sat 9:00-18:00, Sun from 11:00, shorter hours off-season; +420 326 551 049, www.sedlec.info/en/cathedral).
Getting from the Bone Church to Town: The helpful TI between the Bone Church and St. Mary’s can call you a taxi (about 150 Kč to St. Barbara’s Cathedral—the start of my self-guided walk, taxi +420 777 239 909 or +420 800 100 512, arrives within 10 minutes). It’s also possible by public bus (details at TI) but you’ll save time and effort with a quick taxi ride.
IN THE CENTER
▲▲St. Barbara’s Cathedral (Chrám Sv. Barbory)
The cathedral was founded in 1388 by miners who dedicated it to their patron saint. The dazzling interior celebrates the town’s sources of wealth, with frescoes featuring mining and minting. This church was a stunning feat of architecture by three of Prague’s Gothic geniuses: Johann Parler, Matyáš Rejsek, and Benedict Ried. And, like Prague’s cathedral, it sat unfinished and sealed off for centuries, until it was finally completed in the early 20th century.
Cost and Hours: 180 Kč, 320 Kč combo-ticket with Bone Church and St. Mary’s Basilica; daily 9:00-18:00, shorter hours Nov-March; audioguide-20 Kč, +420 327 515 796, www.khfarnost.cz.
Visiting the Cathedral: While this tour covers the highlights, you’ll receive a more detailed flyer at the ticket desk, or you can rent the more in-depth audioguide.
Head inside, walk to the middle of the main nave, and just take it all in. Intricate, lacy vaulting decorates an impossibly high ceiling that’s also decorated with the coats of arms of local guilds. This is the epitome of Gothic: a mind-bogglingly tall nave supported by flying buttresses that create space for not one but two levels of big windows, pointed arches where the columns converge, and an overall sense of verticality and light.
The gorgeous high altar’s Last Supper scene of carved and painted wood is a neo-Gothic copy of the original. Circle clockwise around the apse, past Baroque altars. In the first chapel (the St. Catherine chapel) stands a Gothic Madonna from 1380, the oldest and most precious statue in the cathedral. As you walk, appreciate the fine stained-glass windows throughout the church. These are by František Urban, a contemporary of Alphonse Mucha who employed a similarly eye-pleasing Art Nouveau flair.
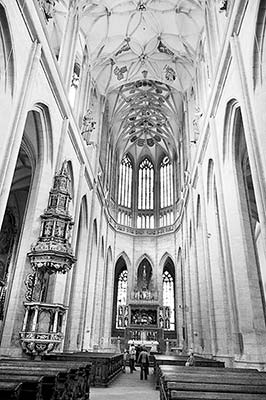
Continue around the apse. The second-to-last chapel, called the Smíšek Chapel, is an artistic highlight. The late-Gothic frescoes—The Arrival of the Queen of Sheba, The Trial of Trajan, and especially the fresco under the chapel’s window depicting two men with candles—are the only remaining works of a Dutch-trained master in Gothic Bohemia. The final chapel, called the Miners’ Chapel, has frescoes under the windows showing miners going about their daily labor. Most miners were healthy, unattached men in their 20s. An average of five miners died each day—from cave-ins, collapsing scaffolding, built-up poisonous gases, fires, and so on.
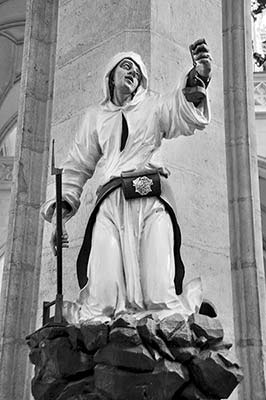
Continue up the side nave. Midway along, look for a wooden miner statue on a pillar on your right. He’s wearing a typical white miner’s coat. White fabric was the cheapest option (as it required no dyes) and was easier to see in the dark. The leather mat wrapped around his waist made it easier for him to slide down chutes inside the mine. His pick-like tool identifies him as the mining foreman.
At the back wall of the long chapel on your left, notice the precious frescoes from 1463 showing two people minting coins.
Loop around the back of the church, coming back up the left nave. You’ll pass finely carved wooden choir benches that blend, in perfect Gothic harmony, with the church’s architecture.
▲Hrádek Castle and the Czech Museum of Silver (České Muzeum Stříbra)
Located in Kutná Hora’s 15th-century Hrádek (“little castle”), the Czech Museum of Silver offers a fascinating look at the primary source of local wealth and pride. Over the centuries, this mine produced some 2,500 tons of silver, copper, and zinc. Today, you can visit the facility on a 1.5-hour tour, which lets you spelunk in the former miners’ passages that run beneath the entire town center. Note that the tour involves some tight squeezes and may be uncomfortable if you’re claustrophobic. Bring warm clothing—mines are cold.
Cost and Tours: The English-language tour (Route II) costs 160 Kč—book ahead (see below). If an English tour is unavailable, book the Czech version; English flyers are provided. Route I, which includes only the aboveground museum, is pointless.
Hours: Tue-Sun 10:00-18:00, April and Oct until 17:00, Nov-Jan until 16:00, closed Mon year-round and Feb-March, last tour 1.5 hours before closing.
Information: +420 327 512 159 or +420 733 420 366, www.cms-kh.cz.
Reservations Recommended: Book a tour slot online two or more days in advance; flag icons indicate which tours are offered in English. It’s also possible to call the day before or the morning of your visit (wait through the Czech recording to speak to someone in English). Without reservations, drop by the museum soon after you arrive in Kutná Hora to reserve.
Visiting the Museum and Mine: First, your guide takes you to see an intriguing horse-powered winch that once hoisted 2,000 pounds of rock at a time out of the mine. You’ll learn the two methods miners used to extract the precious ore: either by hammering with a chisel or pick, or by setting a fire next to a rock—heating it until it naturally cracked.
Then you’ll don a miner’s coat and helmet, grab a bulky communist-era flashlight, and walk like the Seven Dwarfs through the town center to a secret doorway. It’s time to climb deep into the mine for a wet, dark, and claustrophobic tour of the medieval shafts that honeycomb the rock beneath the town—walking down 167 steps, traversing 900 feet of underground passages, then walking back up 35 steps.
Along the way, you’ll see white limestone deposits in the form of mini stalagmites and stalactites, and peer down into a 26-foot-deep pool of crystal-clear water. The mine holds a steady, year-round temperature of 54 degrees Fahrenheit while fat drops of condensation fall continually from the ceiling thanks to the nearly 100 percent humidity. Prepare for the moment when all the lights go out, plunging you into a darkness as total as you’ll ever experience. You’ll understand why miners relied on their other senses. For instance, when silver was struck, it made a telltale sound and smelled faintly like garlic.
Finally, ascending to ground level, your guide will explain safety mechanisms at the surface and walk you through the smelting and minting processes that turned those raw deposits into coins for an entire continent.
Sleeping and Eating in Kutná Hora
Sleeping: Although one day is enough for Kutná Hora, staying overnight saves you money (hotels are much cheaper here than in Prague) and allows you to better savor the atmosphere of a small Czech town.
$ Hotel u Vlašského Dvora and Hotel Garni are two renovated townhouses run by the same management. Furnished in a mix of 1930s and modern style, the hotels come with access to a fitness center and sauna. Hotel Garni is slightly nicer (a few steps off main square at Havlíčkovo Náměstí 513, +420 771 226 021, www.hotelykh.cz).
Eating: $$ Pivnice Dačický has made a theme of its namesake, a popular 17th-century author who once lived here. Solid wooden tables rest under perky illustrations of medieval town life, and a once-local brew, also named after Dačický, flows from the tap. They serve standard Czech fare, as well as excellent game and fish. Service can be slow when a group arrives (daily, Rakova 8, +420 327 512 248, mobile +420 603 434 367).
$$ Dobrá Čajovna Teahouse offers the chance to escape—not to medieval times, but to an Orient-themed paradise. Filled with tea cases, water pipes, and character, this place is an ideal spot to dawdle away the time that this ageless town has reclaimed for you. They serve Indian vegetarian plates and filled pita breads (daily 14:00-22:00, Havlíčkovo Náměstí 84, +420 777 028 481).
$ Restaurace Čtyři Sestry (“At the Four Sisters”) is a family restaurant with a changing rotation of Czech classics, chef’s specials, and vegan fare attracting largely a local crowd. Sit in the modern interior or in the shady courtyard behind the restaurant (long hours Mon-Sat, until 16:00 on Sun, on Havlíčkovo Náměstí, right above Hotel Garni, +420 327 512 749).
$$ Piazza Navona, which obnoxiously advertises itself as “the only true Italian restaurant in town,” draws loyal customers thanks to its decent food and superb outside seating on the main square (daily, Palackého Náměstí 90, +420 327 512 588).
$$ Restaurant-Café Harmonia U sv. Jakuba fills the need if you are open to a European rendition of Mexican food. Sit in the bright red-and-green interior or on the pleasant outdoor patio (daily, Husova 9, +420 327 512 275).
$ Turistka is a charming café that bakes its own goodies and serves an excellent breakfast (Tue-Sun 9:00-18:00, closed Mon, between St. Barbara’s Cathedral and the silver mine at Barborská 29).
Kutná Hora Connections
To return to Prague, hop on a local train from Kutná Hora Město station, near the historical center (or Kutná Hora Sedlec station if you end your day at the Bone Church), and take it to the Kutná Hora main station for your train transfer to Prague. From the main station, trains to Prague run hourly; some require a quick and easy transfer in Kolín. For train schedules, see https://idos.idnes.cz.
Terezín Memorial
Terezín (TEH-reh-zeen), an hour by bus from Prague, was originally a fortified town named after Habsburg empress Maria Theresa (it’s called “Theresienstadt” in German). It was built in the 1780s with state-of-the-art, star-shaped walls designed to keep out the Prussians. Ironically, the town’s medieval walls, originally meant to keep Germans out, were later used by Germans to keep the Jews in.
In 1941, the Nazis removed the town’s 7,000 inhabitants and brought in 58,000 Jews, creating a horribly overcrowded ghetto. As the Nazis’ model “Jewish town” for deceiving Red Cross inspectors, Terezín fostered the illusion that its Jewish inmates lived relatively normal lives—making the sinister truth all the more cruel.
Compared to other such sights (such as Auschwitz or Mauthausen), Terezín (worth ▲▲) feels different: First, the memorial focuses less on the Nazis’ ruthless and calculated methods, and instead celebrates the arts and culture that thrived here despite the conditions—imbuing the place with a tragic humanity. Second, the various museums, memorials, and points of interest are spread over a large area in two distinct parts: a drab grid of a town and the original fortress (across the river, a short walk away). This means you’re largely on your own to connect the dots and flesh out the story (use my self-guided tour to help).
GETTING THERE
The camp is about 40 miles northwest of Prague. It’s most convenient to visit Terezín by bus (described next) or tour bus (various tour companies in Prague offer full-day tours to Terezín, including Wittman Tours, www.wittmann-tours.com).
Buses to Terezín leave from Prague’s Holešovice train station (Nádraží Holešovice, on Metro line C). When you get off the Metro (coming from the city center), head toward the front of the train, go upstairs, turn right, and walk to the end of the corridor. You’ll see bus stands directly ahead, outside the station. The Terezín bus departs from platform 7 (direction: Litoměřice; direct buses Mon-Fri at 9:00, 10:10, and 11:00, Sat at 9:30 and 10:30, Sun at 10:30, 1 hour, pay driver). You’ll arrive in Terezín at the public bus stop on the main square, around the corner from the Museum of the Ghetto. Some buses also stop earlier, by the Small Fortress. The driver and fellow passengers may tell you to get off there, but my self-guided tour works best if you begin at the stop in town (after the bus passes a field of crosses on your right and travels across the river).
For schedules see https://idos.idnes.cz—you want “Terezín Litoměřice.” Be sure to check the return schedule, too—the bus for Prague leaves from Terezín’s main square and takes about an hour (pay driver).
PLANNING YOUR TIME
Because the sights are scattered, plan on lots of walking, and give yourself plenty of time: Three hours is enough for a minimal visit; allow four hours to see everything, and more like five to really delve in. Your understanding of Terezín becomes immeasurably deeper with the help of a local guide (for a list of Prague-based guides, see here).
ORIENTATION TO TEREZÍN
Cost: The 280 Kč combo-ticket includes all parts of the camp.
Hours: Most sights, including the Museum of the Ghetto, Magdeburg Barracks, and Hidden Synagogue, are open daily 9:00-18:00, Nov-March until 17:30. The Columbarium and Crematorium are closed Sat. The Crematorium is open Sun-Fri 10:00-18:00, Nov-March until 16:00; the Small Fortress is open daily 8:00-18:00, Nov-March until 16:30.
Information: +420 416 724 535, mobile +420 604 241 179, www.pamatnik-terezin.cz.
Visitor Information: In Terezín town, the TI is located at the exit from town toward Litoměřice. It has handy information (such as the Prague bus schedule and directions to town landmarks) and helpful staff who speak English (daily 9:00-17:00, Dukelských hrdinů 43, +420 775 711 881, www.terezin.cz).
Tours: Use the form at www.pamatnik-terezin.cz to reserve a guided tour in English (included in entry).
Eating: Avoid the stale sandwiches in the Museum of the Ghetto’s dingy basement cafeteria. The Small Fortress has a $ cafeteria. In Terezín town, $ Atypik Restaurant offers Czech canteen classics popular with students and museum employees, served on an airy terrace or in the cramped interior with a peek into the kitchen (Mon-Fri 9:30-21:00, Sat-Sun 11:00-18:00, Máchova 91, +420 607 554 945).
BACKGROUND
Terezín was the Nazis’ model “Jewish town,” a concentration camp dolled up for propaganda purposes. Here, in a supposedly “self-governed Jewish resettlement area,” Jewish culture seemed to thrive, as “citizens” put on plays and concerts, published a magazine, and raised their families. But it was all a carefully planned deception, intended to convince Red Cross inspectors that Jews were being treated well. The Nazis even coached prisoners on how to answer the inspectors’ anticipated questions.
The Nazi authorities also used Terezín as a place to relocate elderly and disabled Jews from throughout the Third Reich—so the ghetto was filled with prisoners not only from the Czech lands, but from all over Europe.
In the fall of 1944, the Nazis began transporting Jews from Terezín to even more severe death camps (especially Auschwitz) in large numbers. Virtually all Terezín’s Jews (155,000 over the course of the war) ultimately ended up dying—either here (35,000) or in extermination camps farther east.
One of the notable individuals held at Terezín was Viennese artist Friedl Dicker-Brandeis. This daring woman, a leader in the Bauhaus art movement, found her life’s calling in teaching children freedom of expression. She taught the kids in the camp to distinguish between the central things—trees, flowers, lines—and peripheral things, such as the conditions of the camp. In 1944, Dicker-Brandeis volunteered to be sent to Auschwitz after her husband was transported there; she was killed a month later.
Of the 15,000 children who passed through Terezín from 1942 to 1944, fewer than 100 survived. The artwork they created at Terezín is a striking testimony to the cruel horror of the Holocaust. In 1994, Hana Volavková, a Terezín survivor and the director of the Jewish Museum in Prague, collected the children’s artwork and poems in the book I Never Saw Another Butterfly.
 SELF-GUIDED TOUR
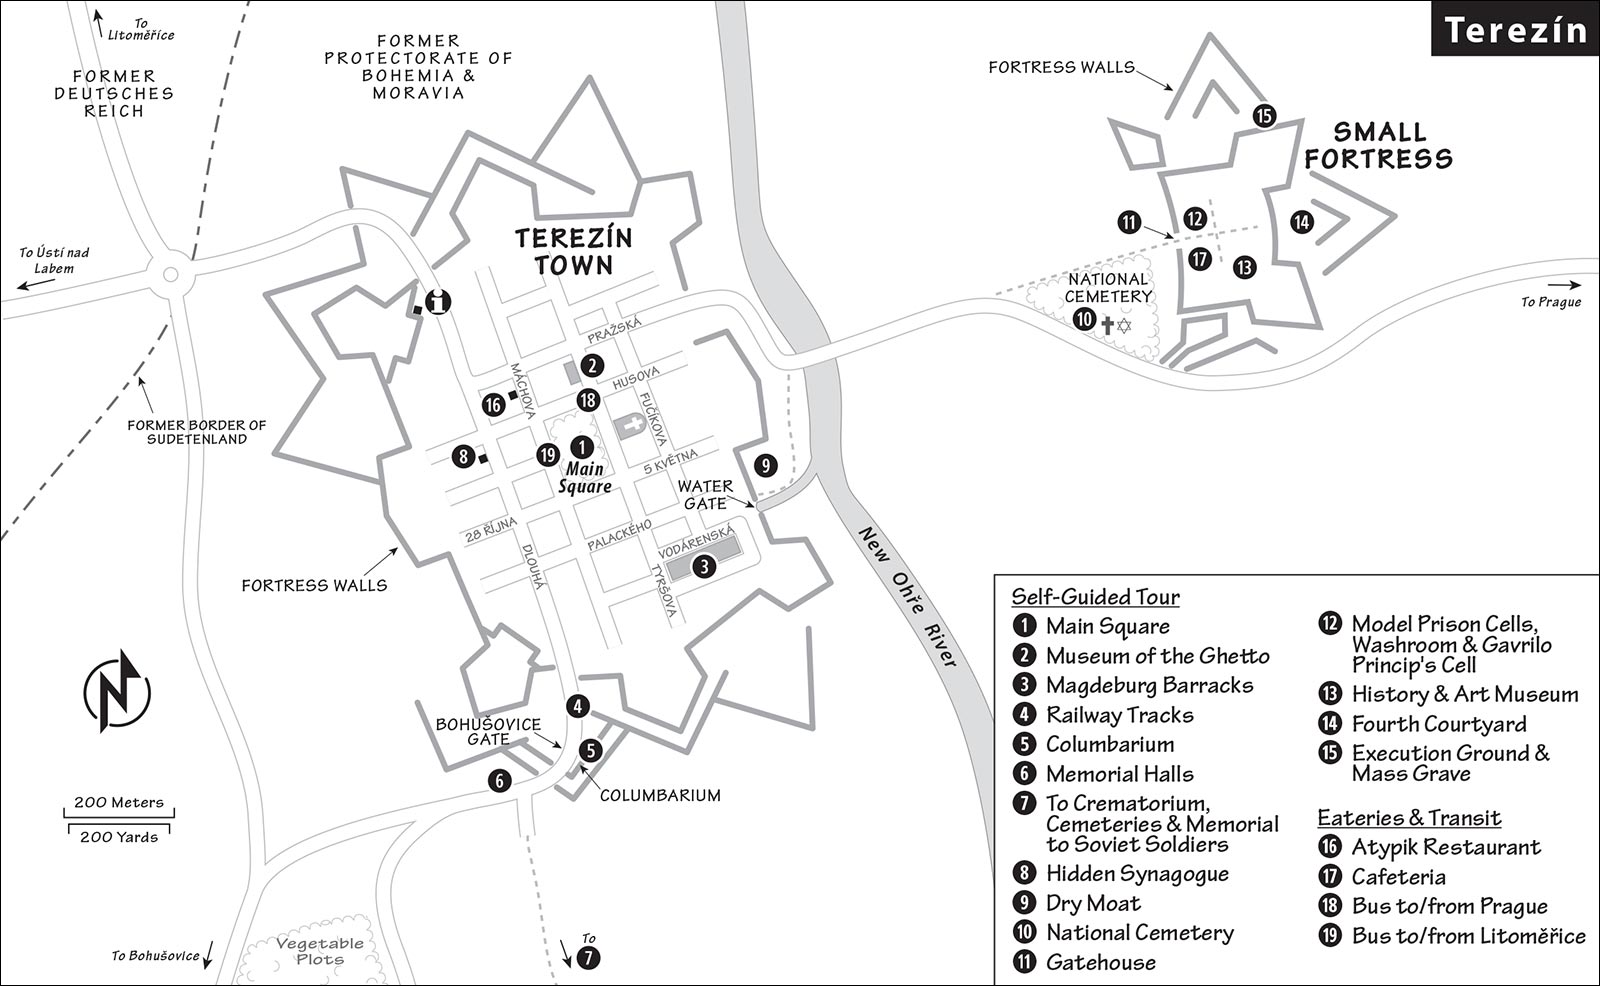
The Terezín experience consists of two parts: the walled town of Terezín, which became a Jewish ghetto under Hitler; and (a half-mile walk east, across the river) the Small Fortress, which was a Gestapo prison camp for mostly political prisoners of all stripes (including non-Jewish Czechs). The complete tour involves about four miles of walking (including the walk from the town to the Small Fortress, then back again to catch your return bus to Prague). Pace yourself. If you want to cut it short, I’ve suggested sections that you could skip.
Terezín Town
• The bus from Prague drops you off at Terezín town’s spacious...
1 Main Square (Náměstí Československé Armády): Today, Terezín feels like a workaday, if unusually tidy, Czech town, with a tight grid plan hemmed in by its stout walls. And for much of its history, that’s exactly what it was. But when Hitler annexed Czechoslovakia, he evicted the residents to create a ghetto for Jews forcibly transplanted here from Prague and elsewhere. Because it started out as a pretty town, rather than a gloomy prison or custom-built concentration camp, the Nazi authorities cultivated Terezín as a “model” to illustrate to the outside world how good the Jews had it here.
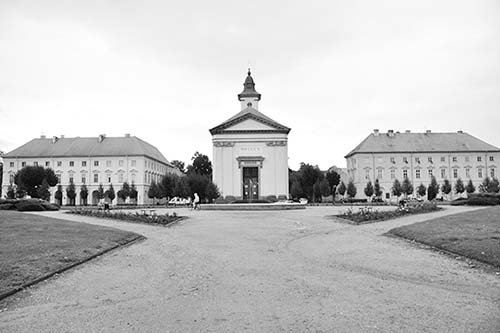
Begin your tour by mentally filling the (now mostly empty) square with thousands of Jewish inmates, all wearing their yellow Juden Star of David patches. Picture the giant circus tent and barbed-wire fence that stood on this square for two years during the war. Inside, Jewish workers boxed special motors for German vehicles being used on the frigid Soviet front. As part of yearlong preparations for the famous Red Cross visit (which lasted all of six hours on June 23, 1944), the tent and fence were replaced by flower beds (which you still see on the square today) and a pavilion for outdoor music performances.
• Just around the corner from the bus stop, in the yellow former schoolhouse that faces the adjacent square, is the...
2 Museum of the Ghetto: This modern, concise, well-presented museum, with artifacts and insightful English descriptions, sets the stage for your Terezín visit. You can buy the Terezín combo-ticket here (and ask about the day’s film schedule—explained later). You’ll find two floors of exhibits about the development of the Nazis’ “Final Solution” and Terezín’s role within it. The ground floor includes some evocative memorials (such as a stack of seized suitcases and a list of Terezín’s victims). The exhibit upstairs illuminates life in the ghetto with historical documents (including underground publications and letters—inmates were allowed to mail one per month), items belonging to inmates, and video footage of survivors’ testimonies. In the stairwell are large illustrations of ghetto life, drawn by people who lived here.
In the basement is a theater showing four excellent films. One film documents the history of the ghetto (31 minutes), offering a helpful, if dry, overview of the sights you’ll see. Two others (14 and 20 minutes) focus on children’s art in the camp, and the last is a 10-minute montage of clips from Der Führer schenkt den Juden eine Stadt (The Führer Gives a City to the Jews), by Kurt Gerron. Gerron, a Berlin Jew, was a 1920s movie star who appeared with Marlene Dietrich in Blue Angel. Deported to Terezín, Gerron in 1944 was asked by the Nazis to produce a propaganda film. The resulting film depicts healthy (i.e., recently arrived) “Jewish settlers” in Terezín happily viewing concerts, playing soccer, and sewing in their rooms—yet an unmistakable, deadly desperation radiates from their pallid faces. The only moment of genuine emotion comes toward the end, when a packed room of children applauds the final lines of the popular anti-Nazi opera Brundibár: “We did not let ourselves down, we chased the nasty Brundibár away. With a happy song, we won it all.” Even the Nazis were not fooled: Gerron and his wife were shipped to Auschwitz, and the film was never shown in public.
• To learn more about living conditions in the camp, return to the main square and continue straight past it, along Tyršova street. A few blocks down, just before the wall, on the left you’ll find the...
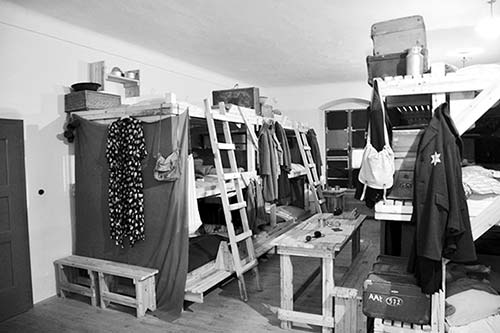
3 Magdeburg Barracks: Peek inside the large courtyard, then continue upstairs and follow the one-way, counterclockwise loop. First you’ll see a meticulously restored dormitory, complete with three-tiered beds, suitcases, eyeglasses, dolls, chessboards, sewing kits...and utterly no privacy. After Terezín’s residents were evicted and Jews were imported in huge numbers, every available space was converted from single-family apartments to outrageously cramped slumber mills like this. Jaunty music lures you around the corner to the first of several rooms celebrating the arts here at Terezín. You’ll see exhibits on composers, artists, and writers who expressed their creativity even in these horrifying conditions. These include profiles of individuals and a wide variety of stirring illustrations of life in the ghetto. Near the end is a room reproducing the camp cabaret stage, where inmates entertained each other.
• With limited time or energy, consider skipping the next several stops, which take a long, if poignant, detour outside the walls. Jump ahead to the moat (see “Dry Moat,” later) by leaving the barracks, turning right, and walking 100 yards to a brick gate. (If you do decide to skip the following stops, you can easily fit in the Hidden Synagogue at the end, before hopping on your bus back to Prague, as it’s one block from the main square.)
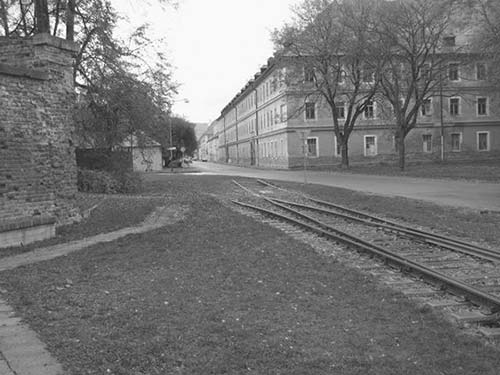
To continue the full tour, exit the barracks, turn left, and walk until you dead-end at the city wall. Turn right and walk along the inside of the stout wall to the far corner. Slicing through the hole in the wall are the remnants of...
4 Railway Tracks: In the early years of the camp, Jews arrived at the train station in the nearby town of Bohušovice and then had to walk the remaining 1.5 miles to Terezín. This was too public a display for the Nazis, who didn’t want townspeople to observe the transports and become suspicious (or to try to interact with the inmates in any way). So the prisoners were forced to construct a railway line that led right to Terezín...and then back out again to Auschwitz.
• Follow the tracks outside the wall.
5 Columbarium and 6 Memorial Halls: Exiting the wall, on the left is a Columbarium, where the Nazis deposited cardboard boxes containing the ashes of dead prisoners. The Germans originally promised that the remains would be properly buried after the war, but in 1945, to erase evidence, the ashes of Terezín victims were dumped into the Ohře River. Farther along, past the little pension/café and across the bridge, on the right you will find Jewish and Christian ceremonial halls and the main morgue.
• When the main road swings right, take the left turn (marked Krematorium) and walk past bucolic vegetable plots and fruit gardens, and along a driveway lined with pointy poplar trees, to reach the...
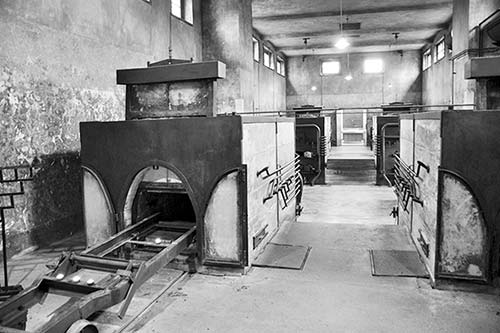
7 Crematorium and Cemeteries: The low-lying yellow building (to the left of the monumental menorah) is the crematorium, where Nazis burned the bodies of those who died here. Step inside to see a small exhibit on death and burial in the ghetto (explaining that, over time, single graves in coffins gave way to mass graves, then to simply burning bodies en masse and dumping the ashes in the river). Then head into the chilling main chamber, where four ovens were kept busy cremating bodies.
Outside, surrounding the crematorium is a Jewish cemetery with the bodies of those who had died before cremation became the norm. Farther to the right (as you face the crematorium) is a Russian cemetery and a Memorial to Soviet Soldiers. The Soviets liberated Terezín without a fight as the Nazis retreated, on May 8, 1945. But just days before, an epidemic of typhus had spread through the camp. In the weeks after the war ended, scores of Soviet soldiers and medical workers who tried to contain the epidemic died, along with hundreds of former prisoners.
• Retrace your steps back through the wall, and continue straight ahead past the train tracks, up Dlouhá street. After three blocks, watch on the left for the low-profile green house at #17. Walk through the corridor to reach the fascinating...
8 Hidden Synagogue: Inside you’ll find a courtyard; the bakery that used to be here hid the synagogue behind it. This is the only one of the camp’s eight hidden synagogues that survived. The atmospheric space is still inscribed with two Hebrew captions, which are translated as “May my eyes behold, how You in compassion return to Sinai,” and “If I forget Jerusalem, may my tongue rot and my right arm fall off.” These words indicate that the prayer room belonged to a congregation of Zionists (advocates of a Jewish state), who, one would expect, were specifically targeted by the Nazis.
Upstairs, a few prisoners lived in a tight attic space. Even though the cramped rooms (reconstructed with period items) seem impossibly small, they were a far better accommodation than the mass housing in which most prisoners were interned. It’s thought that a group of craftsmen who labored in a nearby workshop were “lucky” enough to live here.
• Leaving the synagogue house, turn right, and at the corner, turn left to pop out at the main square. To proceed to the Small Fortress, head down Tyršova as if you’re going to the Magdeburg Barracks. Before you get there, turn left along the park, then continue one block up Palackého to the brick gate. You’ll cross a bridge over a...
9 Dry Moat: Imagine this moat filled with plots of vegetables, grown by starving Jews for well-fed SS officers. Turn left and walk along the moat. The top of the fortification walls on the other side were once equipped with benches and pathways.
• When you reach the main road, turn right across the New Ohře River (the original course of the river was diverted here when Terezín was built). After about five minutes, you’ll come to a blocked-off, tree-lined driveway and the prison camp.
Terezín Prison Camp
• On the right side of the driveway is the wedge-shaped...
10 National Cemetery: The remains of about 10,000 victims of Terezín (including 2,386 individual graves; the rest were moved here from mass graves elsewhere) fill this cemetery, which was created after the war’s end. The sea of headstones powerfully illustrates the scope of the crime that took place here. Notice that, in addition to the giant Star of David (closer to the fortress), a cross towers over the cemetery. This is a reminder that you’ve left the Jewish ghetto and are about to enter a very different part of the Terezín complex. From 1940 to 1945, this fortress functioned as a Gestapo prison, through which 32,000 inmates passed (of whom nearly 10 percent died here)—chiefly members of the Czech resistance and communists. While the majority of the camp’s victims weren’t Jewish, the 1,500 Jews interned here were treated with particular severity.
• Now head under the black-and-white-striped gate.
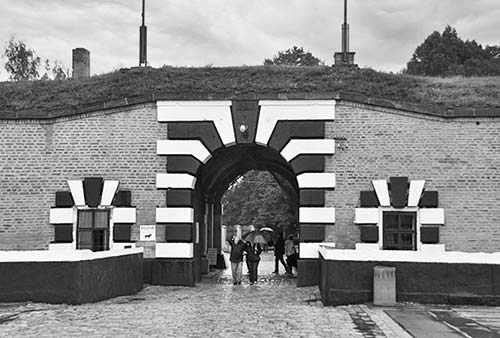
11 Gatehouse: Inside the gate, on the left, is a modest museum about the pre-WWII history of this fortress. If you need a break before continuing, you could pause at the handy cafeteria. The wood-and-metal chandeliers inside were produced by Jewish workers for the SS officers who once dined in these two rooms.
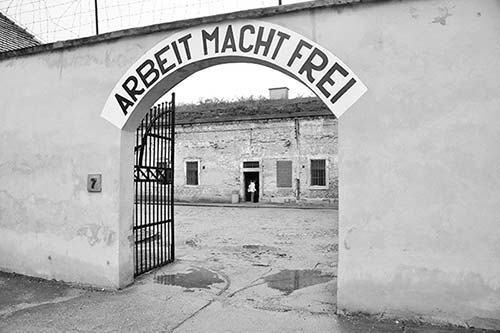
• Continuing into the central part of the fortress, watch on the left for a turnstile into a long, skinny side courtyard. Go in and head to the end of the courtyard, under the notorious Arbeit Macht Frei sign painted above an arched gate (a postwar replica of the viciously sarcastic “Work will set you free” sign that was displayed at all camps). Go under this gate to reach a courtyard ringed with...
12 Model Prison Cells: Step into some of the barracks on the right side of the courtyard to see tight, triple-decker bunks where prisoners were essentially stacked at bedtime. Halfway down the courtyard, under the Block-A sign, peek into the medical cell.
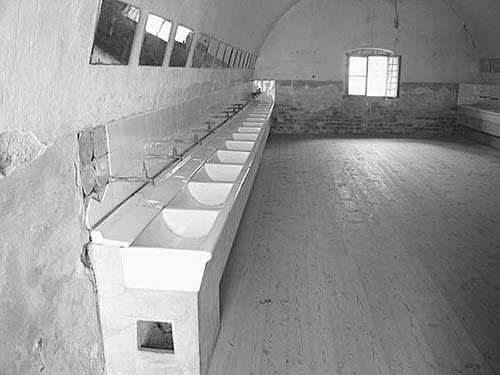
At the far end, the washroom in the right-hand corner (by #15) was built solely for the purpose of fooling Red Cross inspectors. Go ahead, turn the faucets: No pipes were ever installed to bring in water.
The shower room two doors to the left, on the other hand, was used to fool the Jews. Here they got used to the idea of communal bathing, so they wouldn’t be suspicious when they were later taken to similar-looking installations at Auschwitz. (There were no gas chambers at Terezín—most of the deaths here were caused by malnutrition, disease, and, to a lesser extent, execution.)
Before the Nazis, the Austrian monarchy used the Small Fortress as a prison. In the little side courtyard next to the shower room, look for a ghostly doorway with a plaque that recalls the most famous prisoner from that time, Bosnian Serb Gavrilo Princip, whose assassination of Archduke Franz Ferdinand and his wife Žofie in 1914 sparked World War I. Princip died here in 1918 of tuberculosis; of the six Sarajevo conspirators imprisoned here, only two survived.
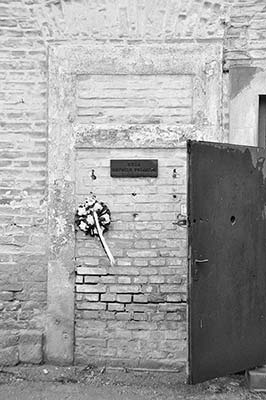
• Return through the Arbeit Macht Frei gate, then back out into the fortress’ central yard. Turn left and continue deeper into the complex. The large building on your right is marked by Muzeum signs.
13 History and Art Museum: The ground floor of this building features an exhibit about the Nazi-era history of the Small Fortress. Photographs and brief descriptions identify many of the individuals who were imprisoned—and in many cases, executed. Upstairs is a gallery of paintings by prominent Czech artists, mostly focusing on themes of camp life (and a few about the Spanish Civil War).
• Back out in the main yard, continue straight ahead, through two gateways in a row. You’ll emerge into the wide, eerie...
14 Fourth Courtyard: Here you’ll have more opportunities to step into former prison cells that flank the yard; some of these house temporary exhibits. At the far end, you’ll find a plaque in the ground listing the 17 countries whose citizens perished at Terezín.
• Returning to the fortress’ main yard once more, turn right and follow the long buildings. Turn right to find the...
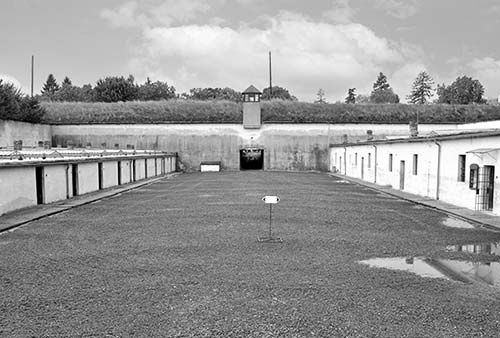
15 Execution Ground and Mass Grave: This is where firing squads executed somewhere between 200 and 300 of Hitler’s enemies. Many of Terezín’s victims were buried in mass graves along the fortress ramparts. After the war, these remains were moved to the National Cemetery we saw on the way into the fortress.
• Our tour ends here. As you ponder Terezín, remember the message of all such memorials: Never again.
Konopiště Castle
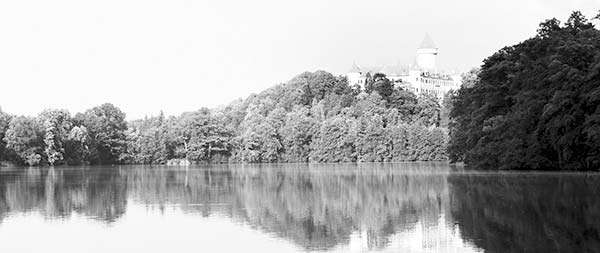
Konopiště (KOH-noh-peesh-tyeh) was the Neo-Gothic residence of the Archduke Franz Ferdinand d’Este—the heir to the Austro-Hungarian Empire, whose assassination sparked World War I. Located 30 miles south of Prague, it’s workable either as a day trip or on the way to Český Krumlov. While it’s the least visually arresting of the castles near Prague, its interior has some captivating stories to tell about its former inhabitants. Enjoyable for anyone, Konopiště is worth ▲ for most. But it’s a must for Habsburg aficionados—historians find it worth ▲▲▲.
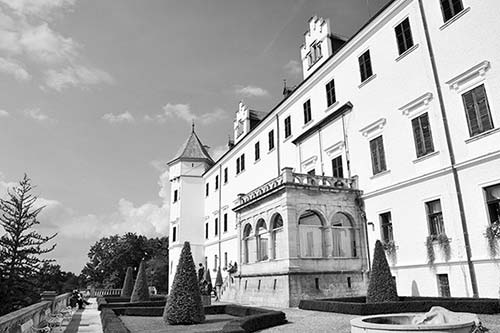
Construction of the castle began in the 14th century, but today’s exterior and furnishings date from about 1900, when Franz Ferdinand renovated his new home. As one of the first castles in Europe to have an elevator, a WC, and running water, Konopiště shows “modern” living at the turn of the 20th century.
Those who lived at Konopiště played a role in one of the most important moments in European history: Franz Ferdinand’s assassination in Sarajevo (chillingly illustrated by items displayed inside the castle). The shooting eventually meant the end of the age of hereditary, divine-right, multiethnic empires—and the dawn of a Europe of small, nationalistic, democratic nation-states. Historians get goose bumps at Konopiště, where if you listen closely, you can almost hear the last gasp of Europe’s absolute monarchs.
The castle interior is only viewable via a guided tour. There are several tour options, but the best is Route 3 (limited space, so book online or call ahead to reserve—see “Orientation to Konopiště,” later).
GETTING THERE
By Train: Trains from Prague’s main station drop you in Benešov (2/hour, 1 hour, https://idos.idnes.cz); a well-marked trail goes from the station to the castle (1.5 miles). To walk to the castle, as you exit the Benešov train station, turn left and walk along the street parallel to the railroad tracks. Turn left at the first bridge you see crossing over the tracks. Along the way you’ll see trail markers on trees, walls, and lampposts—one yellow stripe between two white stripes. Follow these markers. As you leave town, watch for a marker with an arrow pointing to a path in the woods. Take this path to bypass the castle’s enormous parking lot, which is clogged with souvenir shops and bus fumes.
By Car: Konopiště is about a 45-minute drive from Prague and a two-minute detour off of the main route to Český Krumlov (head east toward Brno on the D-1 expressway; take exit #21 toward Benešov/České Budějovice/Linz; after about 9 miles (15 kilometers) watch for the Konopiště turnoff on the right). Bypass the first, giant parking lot (ringed by restaurants); a bit farther along, on the left near the lake, is a smaller lot that’s closer to the castle. From either lot, hike uphill about 10-15 minutes to Konopiště.
ORIENTATION TO KONOPIŠTĚ
Cost and Tours: The recommended Route 3 is 370 Kč in English. Routes 1 and 2 are 270 Kč apiece. All tickets are 30 Kč cheaper if you join a Czech-speaking tour (but renting the English audioguide costs 50 Kč—effectively negating most of your savings).
Hours: May-Aug Tue-Sun 10:00-17:00; Sept 9:00-16:00; April and Oct-Nov until 15:00; closed Mon year-round and Dec-March.
Information: +420 317 721 366, www.zamek-konopiste.cz.
Reservations Recommended: Space on Route 3 is limited to eight people per hour: It’s smart (and worth the small extra charge) to reserve a spot in advance on their website, or by calling one day ahead or on the morning of your visit.
VISITING THE CASTLE
While there are three tour options, Route 3 is the most intimate and interesting. It takes you through the rooms where Franz Ferdinand, his Czech bride Žofie, and their three kids lived while waiting for Uncle Franz Josef to expire. When the communists took over, they simply threw drop cloths over the furniture and let the place sit, untouched, for decades. Now everything has been meticulously restored (with the help of 1907 photographs)—launching you right into a turn-of-the-20th-century time capsule.
The tour takes you through halls upon halls of hunting trophies (each one marked with the place and date of the kill), paintings of royal relatives (including an entire wall of Italian kings—relations of Franz Ferdinand’s Neapolitan mother), and photographs of the many places they traveled and the three kids as they grew up. The tour includes Franz Ferdinand’s dressing room (with his actual uniform and his travel case all packed up and ready to go); his private study (which feels like he just stepped away from his desk for a cup of coffee); the living room (with 1,180 pairs of antlers on the walls); the private dining room (with the table set for an intimate family dinner for five); the master bedroom (with its huge bed); the children’s bedrooms, playrooms, and classroom (with their toys and books still on the shelves); three bathrooms with running water and flushing toilets; and—in the final room—a glass display case containing the dress Žofie was wearing that fateful day in Sarajevo (including her still blood-stained corset). Down the hall are the royal couple’s death masks, Franz Ferdinand’s bloody suspenders, and the actual bullet that ended Žofie’s life.
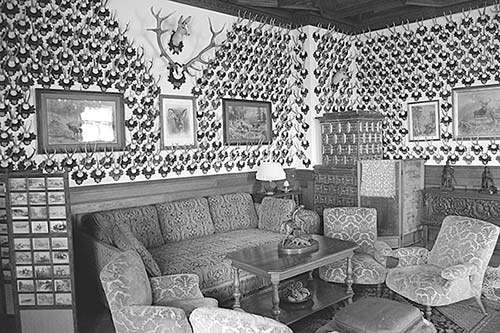
Route 2—which covers the oldest wing of the castle—is also worth considering and provides the most comprehensive look into the castle, its history, and celebrated collections. You’ll see the oversized elevator (with a couch to make the family comfortable on the 45-second ride upstairs), the library, and the staggeringly large armory collection. Route 1, covering some other rooms, the hunting hall, and the balcony, is the least interesting.
Archduke Franz Ferdinand was born to the brother of the Habsburg emperor (Franz Josef) and a Neapolitan princess. After his cousin died under “mysterious circumstances,” Franz Ferdinand was thrust into the role of heir apparent to the throne of the Austro-Hungarian Empire—one of the biggest realms Europe has ever seen. But he had to be patient: His uncle Franz Josef took the throne in 1848 and would hold onto it for nearly 70 years. In fact, he outlived his nephew.
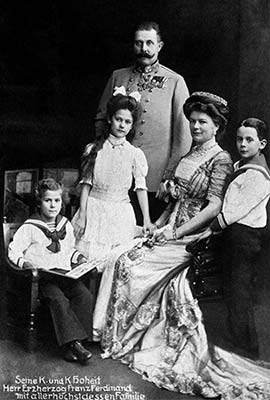
While he waited, Franz Ferdinand kept himself busy by spending time at his bachelor pad in Konopiště. At a ball in Vienna, he met a gorgeous but low-ranking Czech countess, Žofie Chotková. The couple danced all night. After long years of secret courtship, Franz Ferdinand announced his intentions to marry Žofie. His uncle was displeased—Žofie was an aristocrat, not a princess as expected as the spouse for the heir apparent. Franz Josef insisted that Žofie could never be an empress and none of their children could inherit the throne. These family squabbles cemented Franz Ferdinand and Žofie’s preference for living at Konopiště.
While waiting for a succession that would never arrive, Franz Ferdinand threw himself into his hobbies with zeal. He traveled around the world twice—partly for diplomatic reasons, but largely to pursue his passion for exotic hunting. Shooting anything in sight—deer, bears, tigers, elephants, and crocodiles—he killed about 300,000 animals, a few thousand of which stare morbidly at you from the walls at Konopiště. Franz Ferdinand and Žofie were also devoted parents, raising three children: Žofie, Max, and Ernesto.
In the Kaiser’s Pavilion on the grounds of Konopiště, Franz Ferdinand met with German Kaiser Wilhelm and tried to talk him out of plotting a war against Russia. Wilhelm argued that a war would benefit both Germany and Austria: Germans wanted colonies, and the Austro-Hungarian Empire could use a war to divert attention from its domestic problems. But Franz Ferdinand foresaw war as suicidal for Austria’s overstretched monarchy.
Soon after, Franz Ferdinand and Žofie went to Sarajevo, in the Habsburg-annexed territories of Bosnia and Herzegovina. There Gavrilo Princip, a Bosnian Serb separatist, shot the Habsburg archduke who so loved shooting, and Žofie. Franz Ferdinand’s assassination ironically gave the Germans (and their allies in the Austro-Hungarian administration) the pretext to go to war against Serbia and its ally, Russia. World War I soon broke out. The event Franz Ferdinand had tried to prevent was, in fact, sparked by his death.
Other Sights at the Castle: Your tour ticket includes two quirky additional sights that are worth poking into. Franz Ferdinand’s Shooting Range, just off of the castle courtyard, offers a quick glimpse at the emperor-in-waiting’s elaborate system of moving targets; a video demonstrates how the various targets would move around to keep his skills sharp. The Museum of St. George, tucked beneath the long terrace (around the side of the palace), displays Franz Ferdinand’s collection of hundreds of sculptures and paintings of St. George slaying the dragon...taking a theme to an extreme.
While the stretch between the parking lot and the castle entrance is overrun by tour groups, the gardens and the park are surprisingly empty. In the summer, the flowers and goldfish in the rose garden are a big hit with visitors. The peaceful 30-minute walk through the woods around the lake (wooden bridge at the far end) offers fine castle views.
Tucked away in the bushes behind the pond is a pavilion coated with tree bark, a perfect picnic spot. This simple structure, nicknamed the Kaiser’s Pavilion, was the site of a fateful meeting between the German Kaiser Wilhelm and the Archduke Franz Ferdinand.
Eating at Konopiště Castle: $$ Zámecká Restaurace sits under the hill halfway between the parking lot and the lake. Known for its affordable game, this is an appropriate culinary tie-in after touring the hunting-obsessed archduke’s quarters (daily until 16:00, July-Aug until 18:00, +420 602 296 039). Or consider bringing picnic supplies from Prague (or buy them at the grocery store by the Benešov train station) and enjoy the peace and thought-provoking ambience of a picnic in the shaded Kaiser’s Pavilion. Or eat cheaply on Benešov’s main square (try $ U Zlaté Hvězdy—“The Golden Star”).